

Windows 11 is an impressive operating system, but even the most cutting-edge software can benefit from a little optimization. One of the easiest ways to enhance your Windows 11 experience is by tweaking its visual effects. By disabling unnecessary animations and effects, you can potentially enjoy smoother performance, particularly on older or less powerful devices. In this guide, we’ll walk you through the steps to turn off these visual effects and unlock the full potential of your Windows 11 system.
Disabling Visual Effects
Windows 11 comes packed with visual effects like drop shadows and animations that aim to make the user interface more visually appealing. However, these effects can sometimes bog down system performance, especially on basic PCs or laptops. Fortunately, disabling them is a straightforward process that takes less than a minute.
- Open Settings : Press the Windows key + I shortcut to launch the Settings app.
- Navigate to Accessibility: Click on the “Accessibility” option in the left-hand sidebar.
- Disable Animation Effects: Find the “Visual effects” option and toggle off “Animation effects.”
Alternatively, you can use the Control Panel:
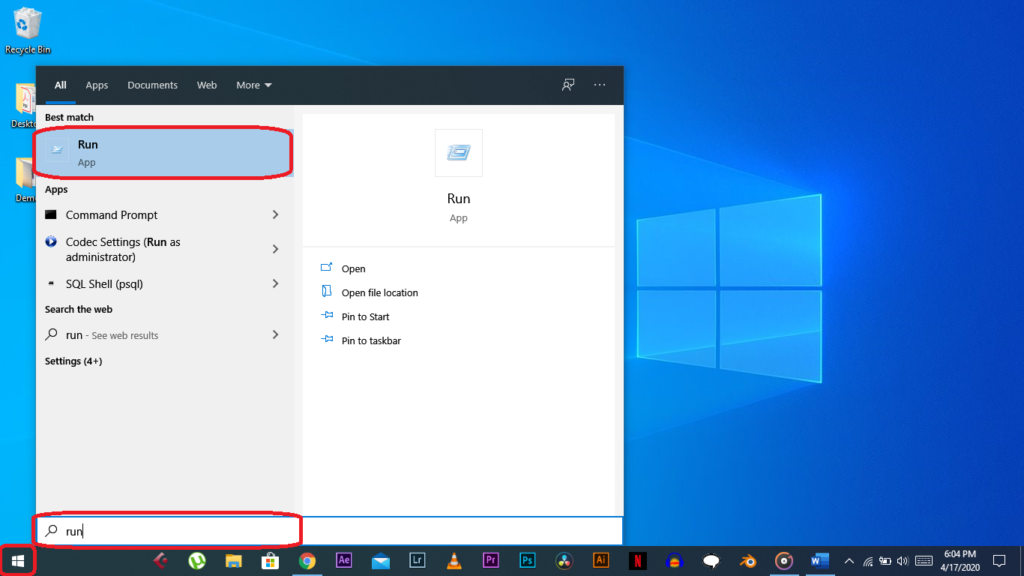
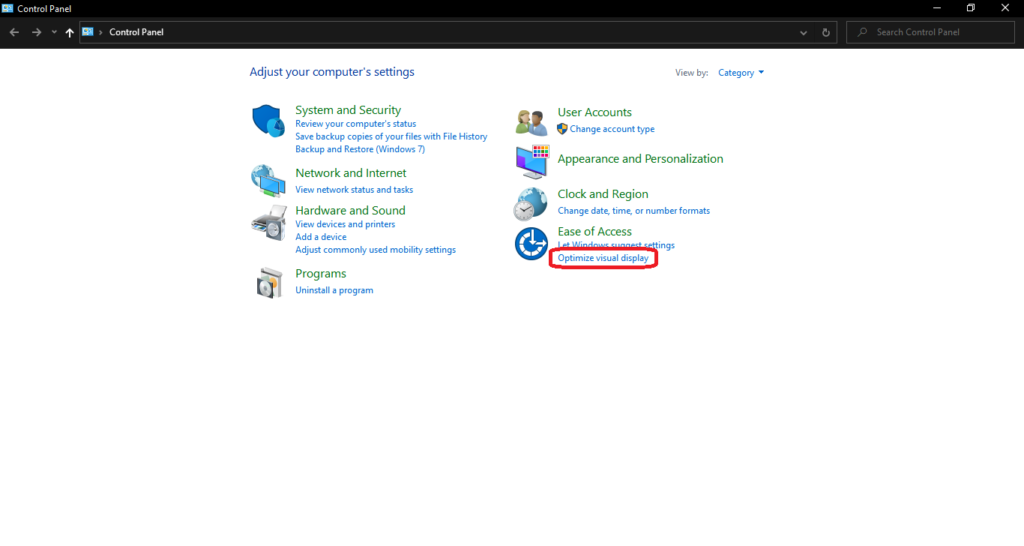
- Access Control Panel: Search for “Control Panel” in the Windows search bar and open it.
- Adjust Performance Settings: Click on “System and Security” > “Advanced system settings” > “Settings” under the “Performance” section.
- Disable Visual Effects: In the “Visual Effects” tab, select “Adjust for best performance.”
Other Performance Enhancements:
Keeping your Windows 11 system up to date is essential for optimal performance. Regularly checking for updates ensures that you have the latest software improvements and device drivers installed. Additionally, utilizing features like ReadyBoost can further enhance performance without the need for hardware upgrades.
Using ReadyBoost:
ReadyBoost allows you to utilize a USB flash drive to improve your PC’s performance by allocating additional memory. Here’s how to use it:
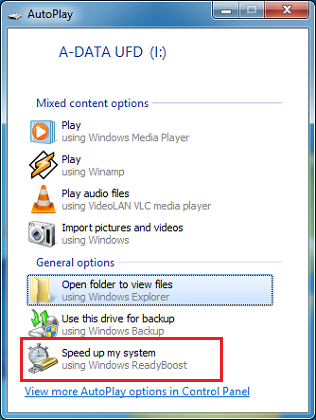
- Insert the USB Flash Drive: Plug the USB flash drive into an available port on your PC.
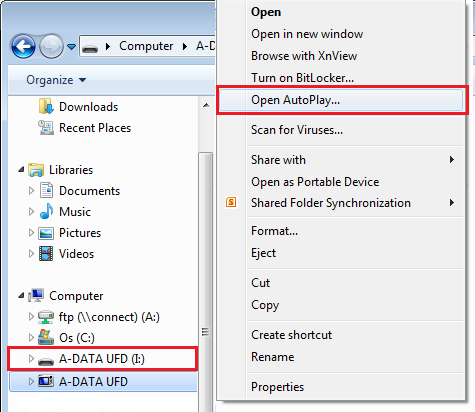
- Access Properties: Right-click on the USB flash drive in File Explorer and select “Properties.”
- Enable ReadyBoost: Go to the ReadyBoost tab and select “Use this device.”
Windows will determine if your device is suitable for ReadyBoost and allocate space accordingly. With these simple tweaks and optimizations, you can ensure that your Windows 11 system is running at its best.
Conclusion:
Enhancing the performance of your Windows 11 system doesn’t have to be complicated. By disabling unnecessary visual effects, keeping your system up to date, and utilizing features like ReadyBoost, you can unlock its full potential. Follow the steps outlined in this guide to boost your Windows 11 performance and enjoy a smoother computing experience.